

Before erection commenced I checked that the components necessary had been supplied and recommend the following essential tools for use;
A string level, electric drill plus assorted drill bits, power screwdriver (if available), measuring tape (6 metres or greater), pencil or felt tip pen, horizontal and vertical level, square, ratchet set, mallet, hammer, manual saw or circular saw, and a good mate (or two as there are sections of this greenhouse that cannot be erected by you alone).
The first step is to drive into the soil, weedmat and sand the stirrups or foundation tubes that will hold in place the greenhouse hoops. Each tube will have two drill holes. The lower one will have the bolt and nut fitted before it is driven into the ground. The higher one is used to affix the hoops and the plinth. With the lower bolt fitted, drive the tubes into the ground using a mallet (not a hammer). It is recommended that a piece of hardwood be placed over the top of the tube as it is driven in to the ground. Do not hammer directly to the tube as this will eventually curl over its lip and restrict the ability to fit the hoop itself.
Each tube must be exactly 1.5 metres apart lengthwise and 2.8 metres apart by width, and the measurements must be precise. Run a string measure lengthwise and place the string at the height of the upper bolt hole so that all four bolt holes are at the level of the string. Repeat for each side. If the bolt holes are not at the exact height the hoops will look uneven. Once all tubes have been driven into the soil, recheck all measurements (distance between each tube length and width and height of bolt hole).
When all tubes have been correctly driven into the soil, each hoop can be fitted and should look as follows;

This fitting of the hoops is a job for two people, one at each end of each hoop. The next task involves applying frame guard or "hot spot" tape to the upper halves of each hoop. This will be the section of hoop that the polthene cover will touch once completed. It is important that during warm weather no metal hoop should touch any part of the polythene cover directly or it can be burnt. The frame guard is meant to protect the cover from any possible burning. The effect of the guard can be clearly seen on the next photograph..
The kit should include 4' x 1" side wall plinths, which in my case were short of the length required. The side wall plinths should run the length of each side of the greenhouse and be bolted using the upper bolt holes of each tube. Make sure the head of the bolt is facing the outside of the greenhouse and not the end of the bolt itself. I also added a washer inside each nut and bolt head to protect the timber.

The kit should also include 4 x metal braces for affixing to the outer hoops and the inner plinth and should be included as part of the bolting process. For the outer hoops there should be 25mm uni joints with wing nuts to tighten. Bolt each brace first after applying the uni joint and then tighten the wing nuts to suit.

For the front and rear plinths I used 4" x 1" timber pieces leaving sufficient space between for the door frame to be fitted. Whilst my kit included nails to affix the timber, I used 90 degree braces at the corners and straight braces to affix the lower door frame. The braces were much stronger and stopped the possibility of splitting the timber (I am lousy with a hammer). Again a string level was needed to check the position of the plinth.
A ridge pipe is provided to secure the "roof" of the greenhouse and is fitted just underneath the hoops with 25mm end tees and 25mm cross joiners. The end tees are a little difficult to use as they come in two separate pieces and need to be bolted properly. Another occasion for another pair of hands. The cross joiners also come in two pieces but it is a simple case of placing one end over the hoop and sliding the clip into place beneath the ridge pole. The result will test the accuracy of of the positioning of the hoops.

If the front and back plinths do not look level, this was simply overcome later by packing sand underneath the timber until the doorframe was fitted in full.
The doorframe is 4" x 2" timber which I initially thought was overkill, but have come to realise that since it is the only part of a greenhouse that gets a lot of use, it better be strong. The kit should also include 4 x 25mm saddle clamps to affix the vertical timber to the front and back hoops. The vertical timber will need to be cut to size and fitted so that it comes to rest just underneath the front hoop and alongside each horizontal door frame. Affix the saddle clamp so that the front of each vertical sits flush with the hoop at the front. They should not be forward of each hoop since the cover must line up with the top of the door. Again I braced the vertical to both the lower and upper horizontal which is fitted once the verticals have been clamped. Again check each level and the distance between each vertical must be the same at the top and the bottom.

Note that whilst this photograph shows only the front door frame, the rear door frame is an exact mirror.
Once the door frames had been completed I added extra bracings from half way up each vertical to both the front and back hoops, using excess 4" x 1" timber. This was not part of the assembly instructions; I simply did it to add extra strength to the construction. If you are a bit of a DIY nut, you will find other ways to strengthen and secure your greenhouse.
If all has gone according to plan, the frame of your greenhouse should look something like this;

The UV protected PVC roofing took all of August to put up because three weeks out of four were too windy. This task requires a day where there is almost no wind to contend with and one or two helping hands. As the PVC sheet is nothing more than a huge sheet, the slightest puff of breeze will create havouc and simply lift it straight off your hoops before you get a chance to secure it. Do not rely on bricks, rocks or timber to hold one end down. It needs to be permanently secured as you progress. In the end I purchased more aluminium channelling and secured the sheeting to both sides of the greenhouse using spring clips cut in half, as such;
With one or two people pushing down on the opposite side of the greenhouse, repeat this on the other side. At least if you secure both sides the sheeting wont be able to fly off. Make sure you have sufficient hangover of the front, back and both sides. If you have laid it upon the hoops correctly the PVC sheeting should touch the ground in front, behind and both sides of the greenhouse. At all times the PVC sheeting must be drawn tight as you fit the spring clips, particularly along the front and rear doorposts and in my case, along the base of the front and rear.

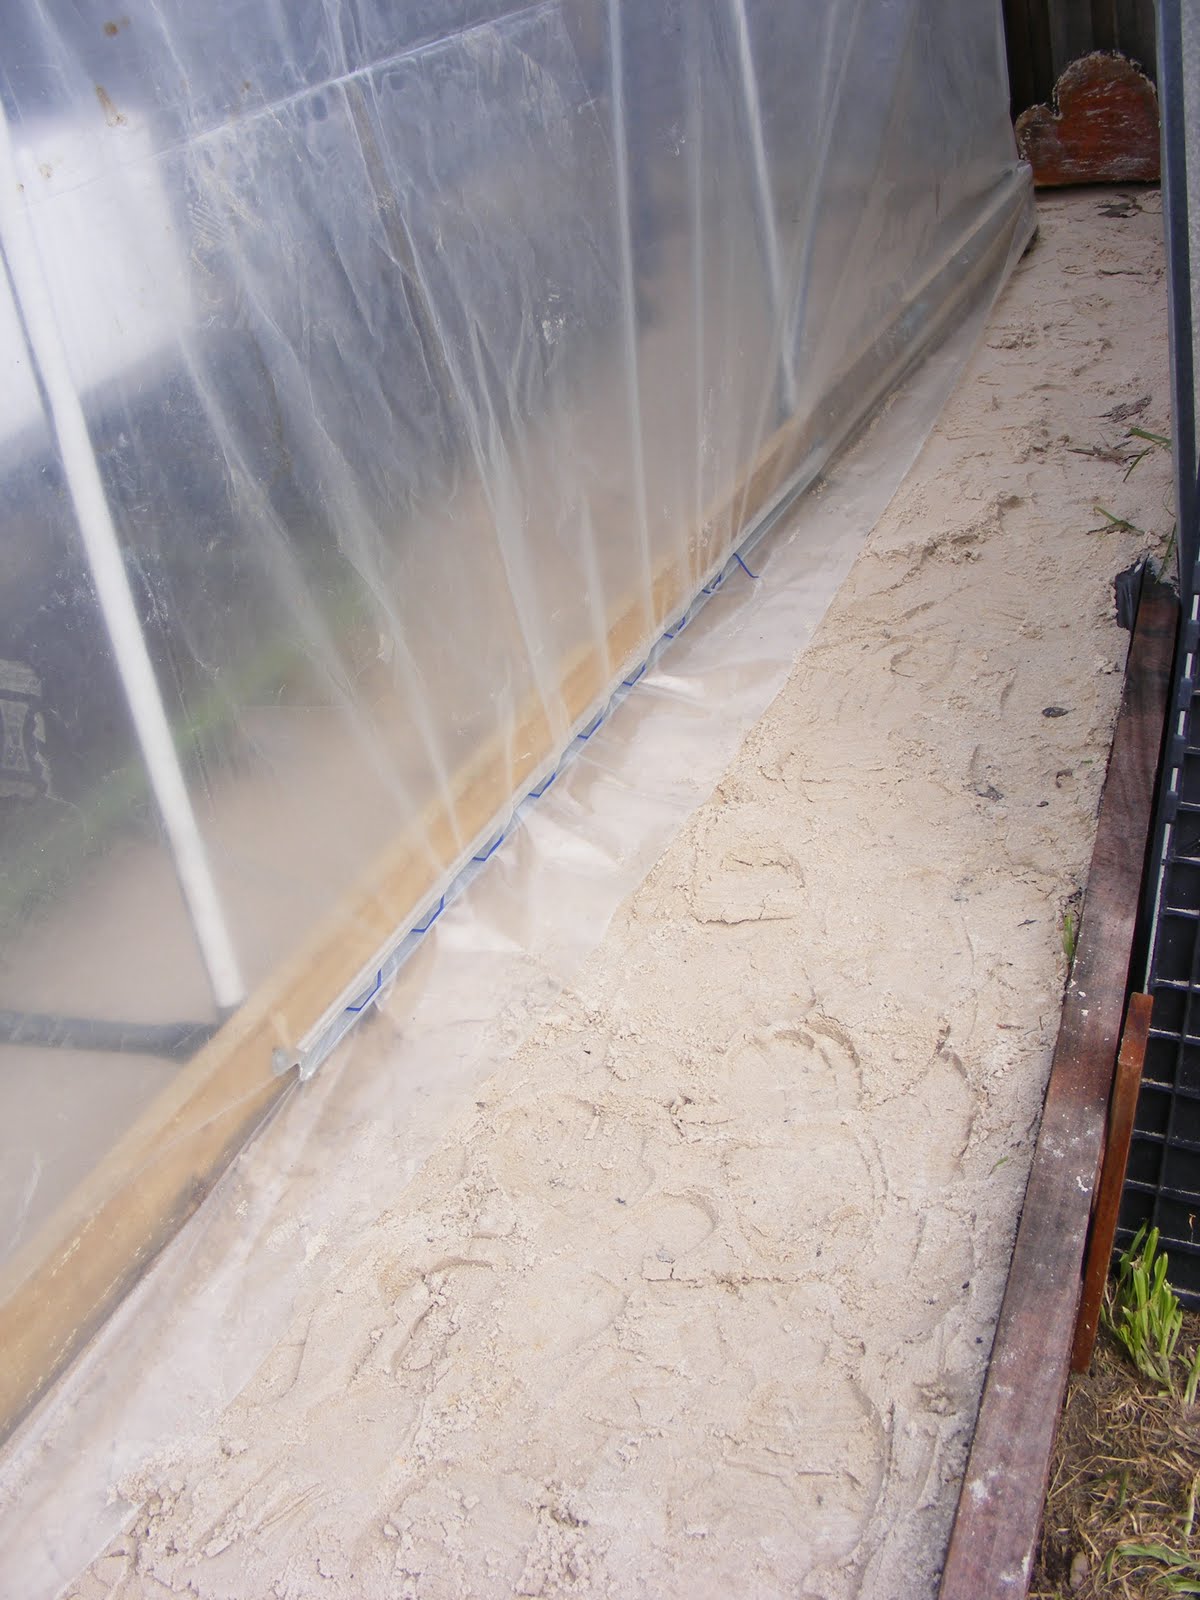
Problem is that because the PVC sheeting is a huge square sheet, at some stage you will have to scrunch it up to keep it tight and secure. I did this three quarters of the way up both door entrances. It doesn't make the finish look attractive but it saves cutting or folding. It is not recommended that the PVC be cut as this will create a weakness, particularly during high winds.

Whilst the instructions suggested that the PVC sheeting could be trimmed of excess after securing with the spring clips, the only places I chose to trim were around the front and back door frames. The excess on the sides at the base can be covered by gravel or Lilydale toppings and will assist to keep out creepy crawlies. Plus from time to time it may be necessary to retighten the sheeting and the excess will give you something to hang onto during the tightening process.
I then fitted both front and back doors by inserting the top into the above door frame aluminium channel, making sure they were exactly centred and level to the frame itself. As this greenhouse was erected at the end of winter I have secured the backdoor on a part permanent basis (this can be changed during the summer), and created a temporary pulley system for the front door. This kit came with two extra metal rods and foundation tubes which are placed in front of both doors. The tubes must be hammered in to the level of the ground, and the rods are inserted once the doors are closed.
The completed greenhouse looks like this;

......and closer up a bit;

After the first twelve month's use we began to realise that without continual ventilation from both ends a PVC sheeted greenhouse would have limited use, particularly on a hot summer's day. The problem with this type of a greenhouse is that it does not come with any natural ventilation of its own. So we had to create it ourselves. As a result the front door has now been permanently rolled up to the top, and a full length fly wire door has been installed in its place. Considering the size of the door frame itself a standard fly wire door fits perfectly, using three hinges and a standard bolt lock, with the added touch of door handles both inside and outside, that are nothing more than PVC pipe brackets. The back PVC door has also been folded up (in the summer only), and fly wire has been permanently affixed to the inside of the rear door frame. For those living in the northern hemisphere, where winter trully is winter), if the PVC doors are rolled up during your warmer months, you can unroll them during your colder months. We also now have a sun protecting screen cover as well. It stays on all year.

If you look carefully enough our front PVC door screen is still rolled up and hidden behind the sun protecting screen. In the unlikely event that we incur a "Canadian blizzard", we can always drop it down. We have also reinforced the base of the fly wire door, since it gets most the the kicking, scraping and general lack of consideration, particularly when shifting large containers packed with soil.
Hi,
ReplyDeleteInterested to know what you have done to the back door. Do you have another fly wire door or have you done something different? Also do you allow your hens to forage in the greenhouse?
G'day,
ReplyDeleteThe backdoor has also been rolled up and flywire mesh has been tacked to the door frame. That means during the summer months there is flow through ventilation, and during winter the pvc door is unrolled and lowered to retain heat. Yes, the front door is left open while "the girls" are free-ranging. Haven't seen a slug since they moved in.
Regards,
Steve
very nice job
ReplyDeleteThankyou. Very lengthy job since I had never built one before and took much longer sice the instructions were atrocious. Hope you have better luck if you construct one.
ReplyDeleteCheers